
Choose a WordPress installation method
Use a header/footer script tool supplied by your theme or a snippet plugin that accepts HTML and JavaScript. A site-wide footer location makes the same assistant available across your public pages. A Custom HTML block on one page is a poor fit for a floating widget intended for the whole website.
Self-hosted WordPress and WordPress.com have different hosting controls. On WordPress.com, confirm that your plan and hosting features allow the script tool you intend to use. This guide describes manual script installation; a dedicated WebotX WordPress plugin is not required.
Approve the WordPress content your assistant should use
Create a WebotX workspace for the public WordPress website. Inspect the captured business overview and individual page summaries, including service pages and policy articles. Correct old details and approve the overview plus at least one included page. Test a likely visitor question in Live simulator and open its source link.
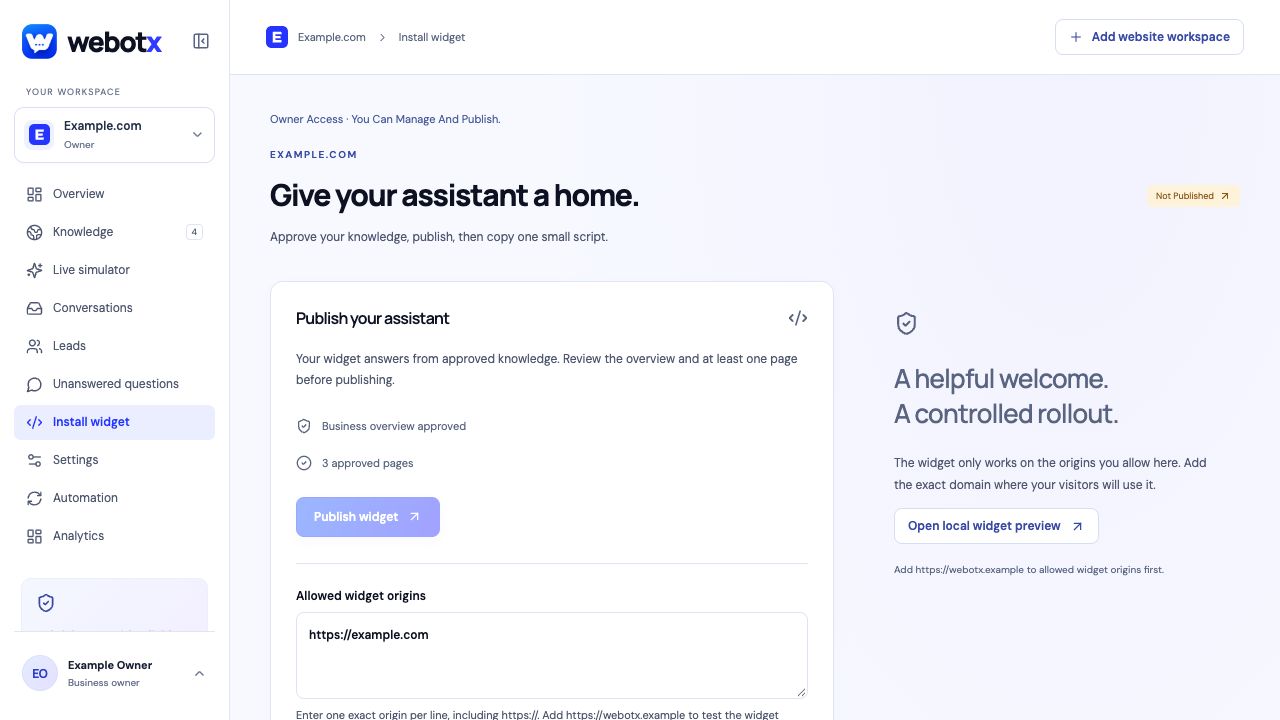
Before enabling the footer snippet, publish the assistant in Install widget. Add the final WordPress website origin to Allowed widget origins. A www address and the same domain without www are separate origins, so use the address your visitors actually reach. Copy the script belonging to this website's workspace.
 View full size
Place the script in your site-wide footer
The labels below depend on your chosen script tool. WordPress.com's official guide describes the Header & Footer screen in WPCode as one option.
- Open your site's header/footer script tool. With WPCode, open Code Snippets → Header & Footer.
- Paste your complete WebotX installation script into the Footer field, or create an HTML snippet assigned to the site-wide footer.
- Save and enable the snippet. Clear your WordPress page cache if your site uses one.
- Open a published page outside the WordPress editor and check the chat launcher.
The WordPress widget script
The sample below illustrates the HTML your footer tool needs. Copy the complete workspace script from WebotX instead of pasting the placeholder key. If a theme field already contains an installation, remove that copy before enabling a second copy through a snippet plugin.
Your WordPress footer loads the chat launcher; WebotX controls its approved answers and appearance. Update the greeting and design in the workspace, and review knowledge there whenever your WordPress content changes.
<script
  src="https://webotx.com/widget.js"
  data-webotx="YOUR_WIDGET_KEY"
  async>
</script>
Test pages, sources, and handoff
Check a service or product page as well as the homepage. The widget should use the same workspace on each page. Then ask a question answered by an approved policy and follow its source link. Ask for a person and confirm that the thread appears in Conversations.
If you change themes or caching tools, repeat the check. An assistant can keep appearing while its information becomes outdated, so review knowledge whenever your business details change.
- Check both mobile and desktop layouts.
- Test a logged-out visit so administrator-only scripts do not hide a problem.
- Verify that only one launcher appears after moving between pages.
Troubleshoot WordPress setup
Check whether the issue affects the footer placement, cached WordPress output, or the answer itself. Changing a snippet cannot fill a gap in approved knowledge; review the source in WebotX when the launcher works but the response is incomplete.
| What you see | What to check |
|---|---|
| No launcher after saving | Confirm the snippet is active and site-wide; clear page caches and check publishing. |
| Works on one page only | Move the snippet from a page block into the shared footer script location. |
| Launcher appears but an answer is missing | Check the approved source version and test the same question in Live simulator. |
WordPress: common questions
Do I need a WebotX WordPress plugin?
No dedicated WebotX plugin is required for this method. A theme script field or an HTML snippet tool can load the widget script across your WordPress website.
Can I add the chatbot to WordPress.com?
Use a WordPress.com plan and hosting configuration that permits your chosen custom-script or plugin method. Check WordPress.com's current requirements before installing.
Does the chatbot automatically read private WordPress pages?
The widget installation does not grant access to private pages or WordPress account data. Build and approve knowledge from suitable sources in your WebotX workspace.
Official platform documentation
Check the platform's current controls and plan requirements alongside this guide.
WordPress.com: add code to your site header or footer