
Find the shared layout for your website
For a traditional HTML site, use the footer or layout template rendered on your public pages. For a React application or another site with client-side navigation, choose a shared layout or script loader that mounts the widget once after the document body exists.
Identify the production origin and any deliberate preview origins before installing. A localhost address only works on the computer hosting that local service. The public installation should use the publicly reachable HTTPS script address generated for your WebotX environment.
Connect the public origin to a prepared workspace
Set up the website in WebotX and inspect the captured overview and page summaries. Approve a corrected overview and at least one included page, then test known and unknown questions in Live simulator. For sites whose text is built in the browser, check capture results rather than assuming visible content was imported.
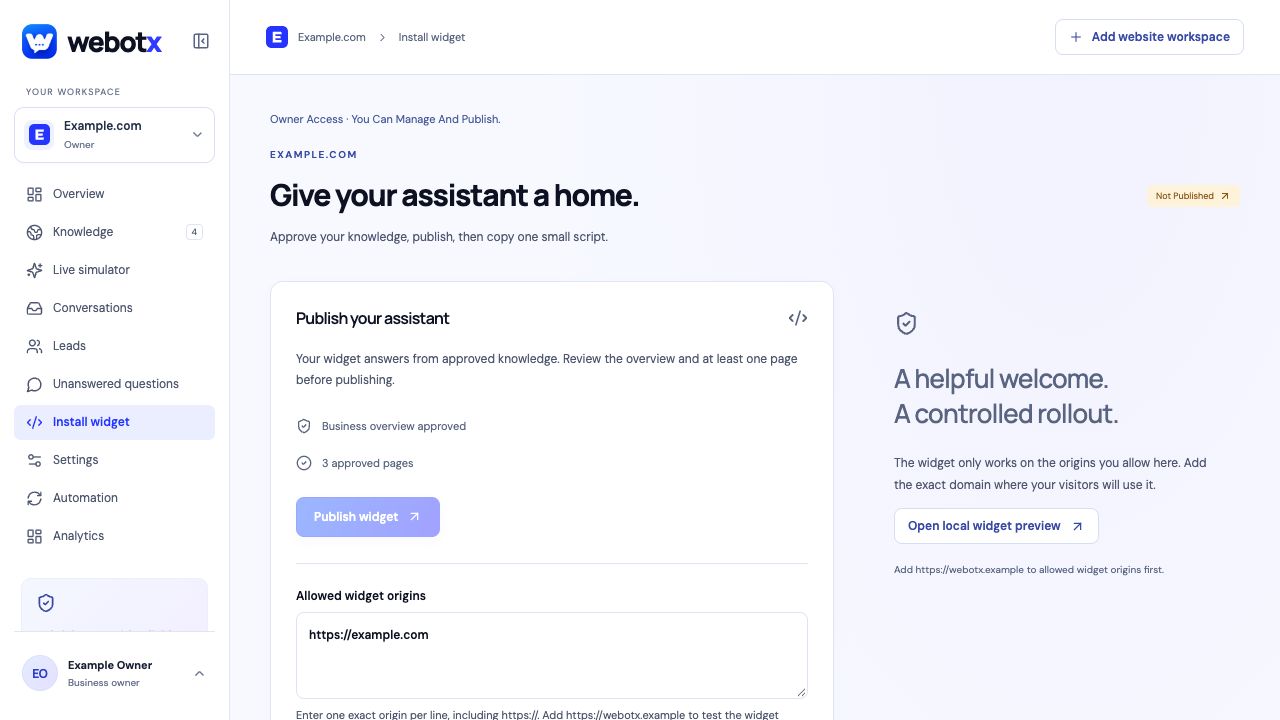
Publish the assistant in Install widget and allow the origin you will deploy to, including its protocol, hostname, and any non-default port. Copy the generated widget script for that workspace. Review preview and production origins independently so a successful local test is not mistaken for a public installation check.
 View full size
Load the script once in the shared layout
Keep the workspace key and script address together when moving code between environments. Use your framework's supported script-loading mechanism if raw script tags are not appropriate in its layout.
- Open the shared layout or footer template used by your public website.
- Add your complete WebotX script before </body>, or load the same script after the body is available in your shared application layout.
- Avoid mounting the script separately in each route component when the shared layout already loads it.
- Build and deploy the website, then test a direct visit and navigation to another page.
The Custom websites widget script
The reference below is a plain HTML representation of the loader. Use the complete generated script and real workspace key from Install widget. If you adapt it to a framework loader, preserve its source and data-webotx attribute and avoid installing a second instance on route changes.
The shared application layout is responsible for loading the widget. Approved business facts and visitor conversations remain managed in WebotX. Debug the script lifecycle when the launcher is missing, and review knowledge when a working launcher cannot answer a question.
<script
  src="https://webotx.com/widget.js"
  data-webotx="YOUR_WIDGET_KEY"
  async>
</script>
Verify both full-page and client-side navigation
Start on a nested URL rather than always entering through the homepage. Then navigate within the site and use the browser's back button. Check that the launcher appears once and the chat remains usable. Include your narrowest supported mobile layout in this check.
If the browser reports blocked requests, inspect the actual script, connection, and image hosts used by your installation against the site's Content Security Policy. Keep that check specific to the deployed configuration. For unanswered questions, inspect approved source content in WebotX before changing the loader.
- Use the correct widget key for the website workspace.
- Check HTTPS and the final hostname, including www if present.
- Test an approved fact, an unknown fact, and a request for a person.
Troubleshoot Custom websites setup
Check the deployed environment and browser lifecycle together: an incorrect public script URL, a missing allowed origin, or repeated route-level mounts produce different problems. Inspect the actual browser error before adjusting the site's configuration.
| What you see | What to check |
|---|---|
| Works locally but not on the public site | Check the public HTTPS script address, deployed code, and production allowed origin. |
| A new launcher appears on each route | Move loading to the shared layout and remove duplicate route-level installations. |
| Browser blocks the widget requests | Check browser errors and the deployed site's script and connection policies. |
Custom websites: common questions
Can I use WebotX on a React or Next.js website?
Use a shared layout and your framework's supported script-loading mechanism to load the WebotX script once after the page body is available. Test route navigation as well as direct page loads.
Does installing a chat widget make a JavaScript-only site crawlable?
No. Installing the widget is separate from capturing knowledge. Check which public pages WebotX actually captured and approve the information needed for answers.
Do I need to build my own chat API integration?
The widget installation in this guide uses the generated script. It does not require building a custom chat interface or writing a separate API integration.